Showing posts with label rub-ons. Show all posts

Sunday, 12 October 2008

Burgundy Birds Card and matching Box

I had a busy World Card Making Day (last Saturday). The first things I made using my new Cuttlebug folder (Birds and Swirls).

I have a Quickutz Revolution so it's not designed to be compatible with other companies; I used thin bits of plastic instead of the embossing mat (which is too thick) and had to run it through the machine twice, embossing the top first and then the bottom the second time through. (If I had the new 12" platform, I would only need to run it through once.) It's no problem, however; it just takes 2 minutes instead of 1 to emboss.

So here's what I made:
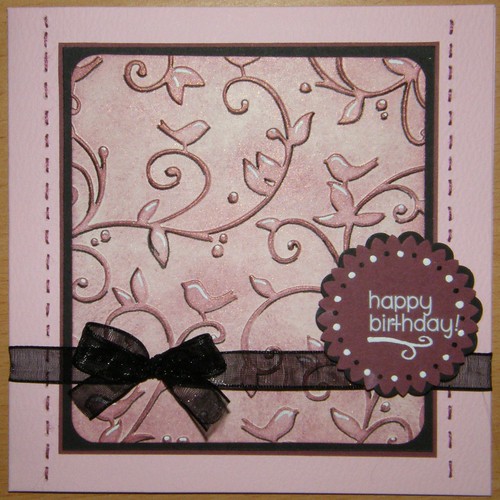
014
1- I embossed cream paper with the Cuttlebug folder and then I used the Brilliance inkpad and a sponge to highlight the embossed parts.
2- I used a black pen for adding shadows and white uniball Signo pen for highlights. Then I rounded the corners and matted the paper.
3- I stitched the left and right sides with burgundy coloured embroidery thread. Then I glued the papers down and added a bow (which is easier to say than do).
4- For the message, I used SU scallop punch once with black and twice wit
h the burgundy paper. Then I added rub-on letters and drew a small swirl and dots.

I used the same techniques to make this mini box out of a card blank.
001
The box holds ribbons and buttons for my friend.
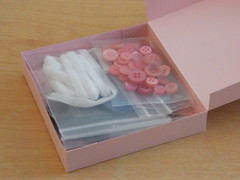
003 002
Materials:
Black, cream, and burgundy papers
Pink card blank
Cuttlebug embossing folder 'Birds and Swirls'
Brilliance Inkpad 'Crimson Copper'
Black pen
White pen (uniball Signo)
corner rounder
embroidery thread
black ribbon (sheer)
SU scallop circle punch
Doodlebug rub-ons
Foam dots

More projects coming soon.

Saturday, 27 September 2008

Butterfly house mini album

mini 009
This is pretty much the second mini-album I've ever made. I've learned a few things I wish I knew before I started.
  1. Cutting and sanding around the scallops took ages, but the finished product is totally worth it, because scallops and sanded edges look so pretty.
  2. Smaller photos are easier to scrapbook (I cut these ones down from 4x6).
  3. Stamps and inking are great - looks cool, but doesn't make the book un-closeable. (I know that's not a word, but you know what I mean.)
  4. It takes me twice as long to make a mini album as I thought it would.
  5. Finding room for a lot of journaling was the hardest, until I added the journaling pages.
mini 002
This butterfly was very active. It flitted in our faces several times. It was also bigger than most of the other butterflies that we saw. And so pretty.

mini 003
"All that we see or seem, is but a dream within a dream. -Edgar Allan Poe"
It was so much fun watching this butterfly flying around this flower. I tried to catch it in action but it moved to fast for me.
mini 004
Our trip to the Southsea Natural History museum was on a lovely warm summer Saturday. It was extra warm in the butterfly room to keep them nice and cozy.
mini 005
This one was resting on the underside of a potted plant.
mini 006
This butterfly is the same as the one from the previous page. It decided to move location when I was photographing it.
mini 007
This was my first trip to the butterfly house but it shouldn't be the last. Ian and I had a lovely day going around Southsea on Sat. July 26th.
"It is never too late to be what you might have been. -George Eliot"
mini 008
Materials:
Magistical Memories chipboard album

Papers:
Black, white pp -> pinkpaislee (vintage moon collection)
orange stripe -> Fiskars Kimberly Poloson
orange bazzil

Stamps:
diamonds, butterfly and dotted lines -> Penny Black 'Salutations' clear set
Arrow -> hero arts letter S set

brown, black, and white inks
clear embossing powder
Basic grey chipboard alpha
various ribbons and rub-ons